—hexo美化—
针对个人主页,介绍了一些Hexo下的Next主题美化操作步骤。
GIT添加到右键
手动添加Git Bash Here到右键菜单(超详细)_gitbash添加到右键-CSDN博客
博客基础配置
站点配置
站点配置在 blog/_config.yml
# Site
title: 华工吴彦祖の小屋         #网站名称
subtitle: ''                  #网站名称下的副签名
description: '我为过往致歉'     #个性签名
keywords: ''
author: 宇宙无敌霹雳暴龙战士孙某   #作者名称
language: zh-CN               #选择语言
timezone: ''

# URL
## Set your site url here. For example, if you use GitHub Page, set url as 'https:'/'/username.github.io/project'
url: https://shx111.gitee.io         #绑定域名
permalink: :year/:month/:day/:title/
permalink_defaults:
pretty_urls:
  trailing_index: true # Set to false to remove trailing 'index.html' from permalinks
  trailing_html: true # Set to false to remove trailing '.html' from permalinks
Next基础配置
在主题配置文件 blog/themes/next/_config.yml
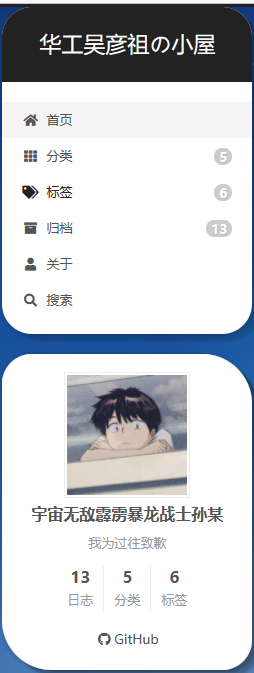
menu:   //设置博客各个页面的相对路径,默认根路径是blog/source
  home: / || fa fa-home                     #主页
  categories: /categories/ || fa fa-th      #分类
  tags: /tags/ || fa fa-tags                #标签
  archives: /archives/ || fa fa-archive     #归档
  #schedule: /schedule/ || fa fa-calendar   #日历
  about: /about/ || fa fa-user              #关于
  #sitemap: /sitemap.xml || fa fa-sitemap   #站点地图
  #commonweal: /404/ || fa fa-heartbeat     #腾讯公益404

# Enable / Disable menu icons / item badges. (图标与计数)
menu_settings:
  icons: true       //是否显示各个页面的图标
  badges: true      // 是否显示分类/标签/归档

avatar:
  # in theme directory(source/images): /images/avatar.gif
  # in site  directory(source/uploads): /uploads/avatar.gif
  # You can also use other linking images.
  url: /images/author.jpg    //将我们的头像图片放置在blog/themes/next/source/images目录下,填写具体地址
  # If true, the avatar would be dispalyed in circle.
  rounded: true  //鼠标放在头像上时是否旋转
  # The value of opacity should be choose from 0 to 1 to set the opacity of the avatar.
  opacity: 1  //头像放缩指数
  # If true, the avatar would be rotated with the cursor.
  rotated: true  //头像是否设为圆形,否则为矩形
效果如下:
自定义logo设置:
favicon:
  small: /images/16x16.png
  medium: /images/32x32.png
  apple_touch_icon: /images/128x128.png
  safari_pinned_tab: /images/logo2.svg
效果如下:

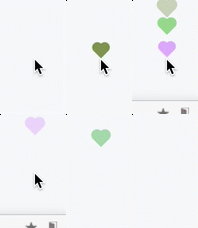
完成鼠标点击出现爱心
效果如下:
具体步骤如下:
在 /themes/next/source/js/src 下新建文件 clicklove.js ,接着把下面的代码拷贝粘贴到 clicklove.js 文件中:
!function(e,t,a){function n(){c(".heart{width: 10px;height: 10px;position: fixed;background: #f00;transform: rotate(45deg);-webkit-transform: rotate(45deg);-moz-transform: rotate(45deg);}.heart:after,.heart:before{content: '';width: inherit;height: inherit;background: inherit;border-radius: 50%;-webkit-border-radius: 50%;-moz-border-radius: 50%;position: fixed;}.heart:after{top: -5px;}.heart:before{left: -5px;}"),o(),r()}function r(){for(var e=0;e<d.length;e++)d[e].alpha<=0?(t.body.removeChild(d[e].el),d.splice(e,1)):(d[e].y--,d[e].scale+=.004,d[e].alpha-=.013,d[e].el.style.cssText="left:"+d[e].x+"px;top:"+d[e].y+"px;opacity:"+d[e].alpha+";transform:scale("+d[e].scale+","+d[e].scale+") rotate(45deg);background:"+d[e].color+";z-index:99999");requestAnimationFrame(r)}function o(){var t="function"==typeof e.onclick&&e.onclick;e.onclick=function(e){t&&t(),i(e)}}function i(e){var a=t.createElement("div");a.className="heart",d.push({el:a,x:e.clientX-5,y:e.clientY-5,scale:1,alpha:1,color:s()}),t.body.appendChild(a)}function c(e){var a=t.createElement("style");a.type="text/css";try{a.appendChild(t.createTextNode(e))}catch(t){a.styleSheet.cssText=e}t.getElementsByTagName("head")[0].appendChild(a)}function s(){return"rgb("+~~(255*Math.random())+","+~~(255*Math.random())+","+~~(255*Math.random())+")"}var d=[];e.requestAnimationFrame=function(){return e.requestAnimationFrame||e.webkitRequestAnimationFrame||e.mozRequestAnimationFrame||e.oRequestAnimationFrame||e.msRequestAnimationFrame||function(e){setTimeout(e,1e3/60)}}(),n()}(window,document);
在 \themes\next\layout_layout.swig 文件末尾添加:
<!-- 页面点击小红心 -->

<script type="text/javascript" src="/js/src/clicklove.js"></script>
代码块增加一键复制
该功能next主题已经内置,我们只要打开就行,主题 blog/themes/next/_config.yml 配置文件搜索 copy_button:
# Add copy button on codeblock
copy_button:
  enable: true #是否开启复制功能
  # Show text copy result. #是否显示提示的复制结果
  show_result: true
配置搜索功能
在站点配置 blog/_config.yml 中添加如下代码:
# Search Config
search:
  path: search.xml
  field: post
  format: html
  limit: 100
然后在 git bash here 中加载相应的插件:
npm install hexo-generator-search --save
npm install hexo-generator-searchdb --save
打开主题 blog/themes/next/_config.yml 内的配置文件,找到 local_search 属性,配置开启本地搜索功能。
local_search:
  enable: true
  # if auto, trigger search by changing input
  # if manual, trigger search by pressing enter key or search button
  trigger: auto
  # show top n results per article, show all results by setting to -1
  top_n_per_article: 1
主页出现 阅读全文 字样
在你编写的md文章里 添加 <!--more--> 即可。
页面布局
效果如下:
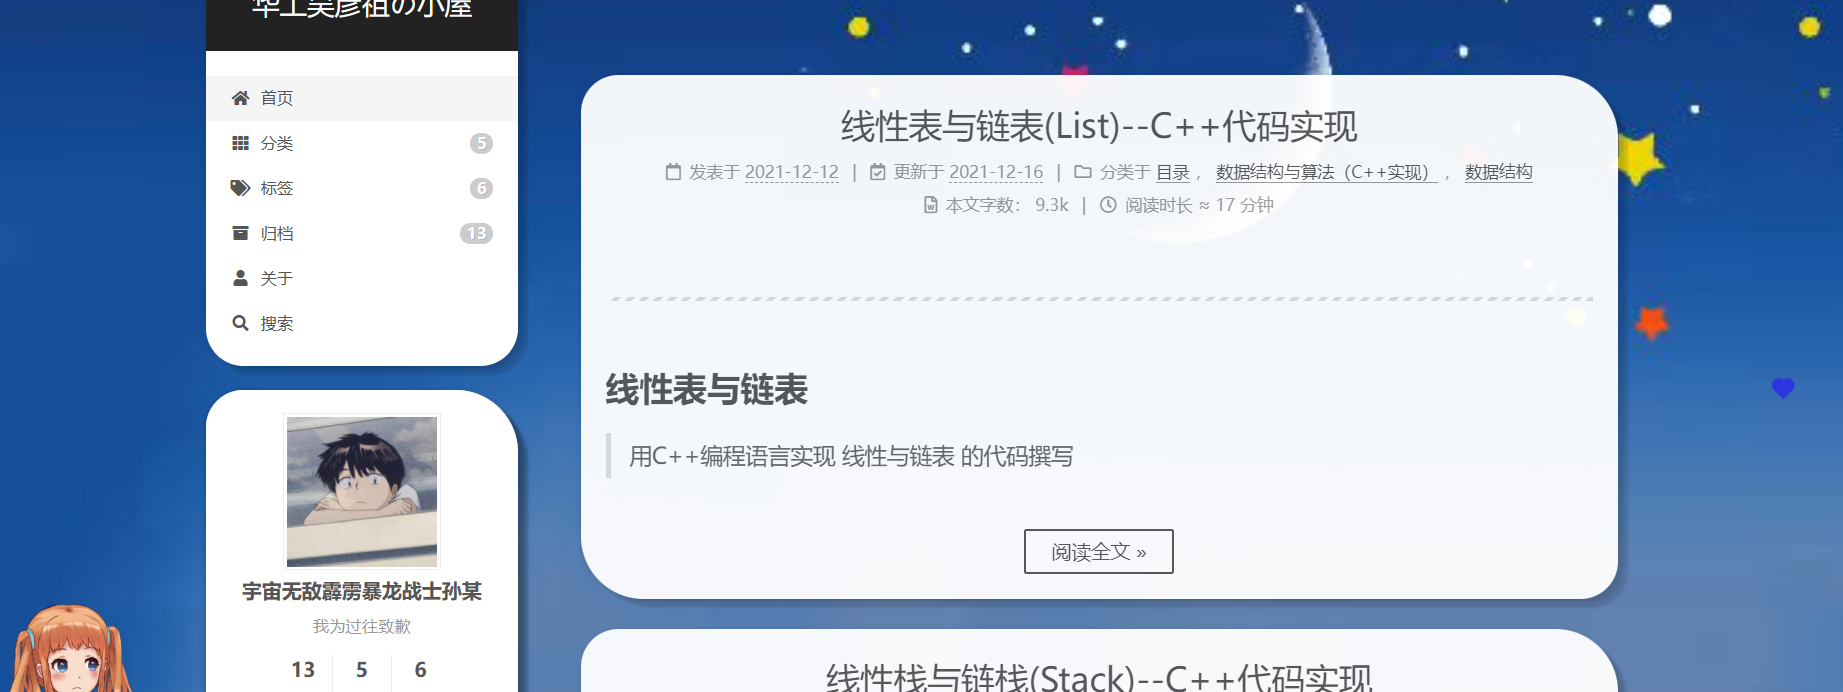
具体步骤参考: Next 8.0 进阶美化篇二 | Bella’s Blog (bella722.github.io)
添加打赏
在主题 blog/themes/next/_config.yml 配置文件中设置如下:
reward_settings:
  # If true, reward will be displayed in every article by default.
  enable: true
  animation: false
  comment: 爱赏不赏(狗头.jpg

reward:
  wechatpay: /images/wechatpay.jpg
  alipay: /images/alipay.jpg
  #paypal: /images/paypal.png
  #bitcoin: /images/bitcoin.png
自己获取自己的支付收款码,放置在 next/source/images 中
主页面添加宠物
效果如下:
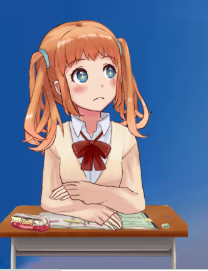
首先在博客目录下执行:
npm install -save hexo-helper-live2d
然后在站点 blog/_config.yml 配置文件中加入:
live2d:
  enable: true
  scriptFrom: local
  pluginRootPath: live2dw/
  pluginJsPath: lib/
  pluginModelPath: assets/
  tagMode: false
  model:
    use: live2d-widget-model-wanko  #选择哪种模型
  display: #放置位置和大小
    position: right
    width: 150
    height: 300
  mobile:
    show: false #是否在手机端显示
上面模型的选择可在lived2d中选择,并下载相应的模型:
npm install live2d-widget-model-shizuku
博客上传图片
1、把主题Next配置文件 _config.yml 里的 post_asset_folder: 这个选项设置为true
2、在你的hexo目录下 git bash here 执行这样一句话npm install hexo-asset-image --save,这是下载安装一个可以上传本地图片的插件 。
3、 在\source\images 的目录下放入你的照片, 然后在你的文章里 照片格式 :
 ---注意这里是绝对路径。
更新博客
在 blog 目录下Git Bash Here,执行下面几条命令,将博客部署到 GitHub 上:
1、hexo clean  (hexo c)
2、hexo generate (hexo g)
(若要本地预览 localhost:4000 就先执行 hexo server) (hexo s)

3、hexo deploy (hexo d)
转载请注明来源,欢迎对文章中的引用来源进行考证,欢迎指出任何有错误或不够清晰的表达。可以在下面评论区评论,也可以邮件至 351134995@qq.com